
Every spell book I drew as a teenager came out looking like a school exercise book with a symbol on the front.
The reason turned out to be embarrassingly simple. I was drawing a rectangle. A book is not a rectangle, it is a box, and until you draw it as a solid object with thickness there is nothing you can add to the cover that will fix it.
Then there is the detail that does more than any amount of decoration: on a real hardback, the cover is slightly bigger than the pages and hangs over them.
Nobody notices that consciously and everybody notices when it is missing. It is the difference between a magic tome and a paperback with a moon drawn on it.
So how to draw a spell book turns out to be mostly a lesson in drawing a box. Six steps, and the first four are all about that.
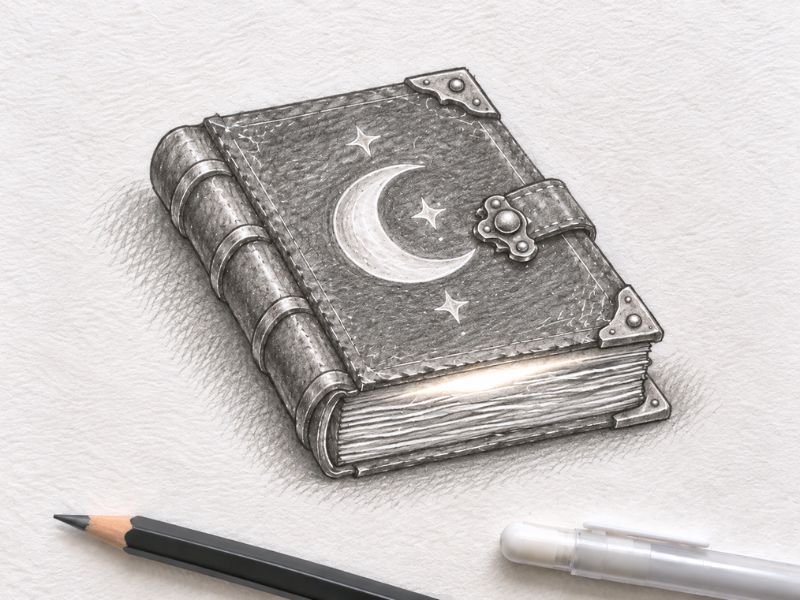
What You’ll Need
- A pencil, an eraser and paper.
- A black fineliner if you want to ink it, and a white gel pen for the glow at the end.
- A ruler is optional and I would leave it in the drawer. Slightly imperfect lines suit an old book better than perfect ones.
How Long Does It Take to Draw a Magic Spell Book?
This magic spell book drawing usually takes about 25 to 35 minutes to complete. Beginners may need closer to 40 minutes, especially when working on the perspective, page details and shading.
Here is a simple time breakdown:
- Basic box and book shape: 8–10 minutes
- Covers and page block: 4–5 minutes
- Spine, clasp and worn details: 6–8 minutes
- Symbol, shading and magical glow: 8–12 minutes
If you only want a simple outline, you can finish the drawing in about 10 to 15 minutes. Inking the lines or adding color may require another 10 to 15 minutes.
How to Draw a Spell Book Step by Step
Step 1: Draw a box, not a rectangle
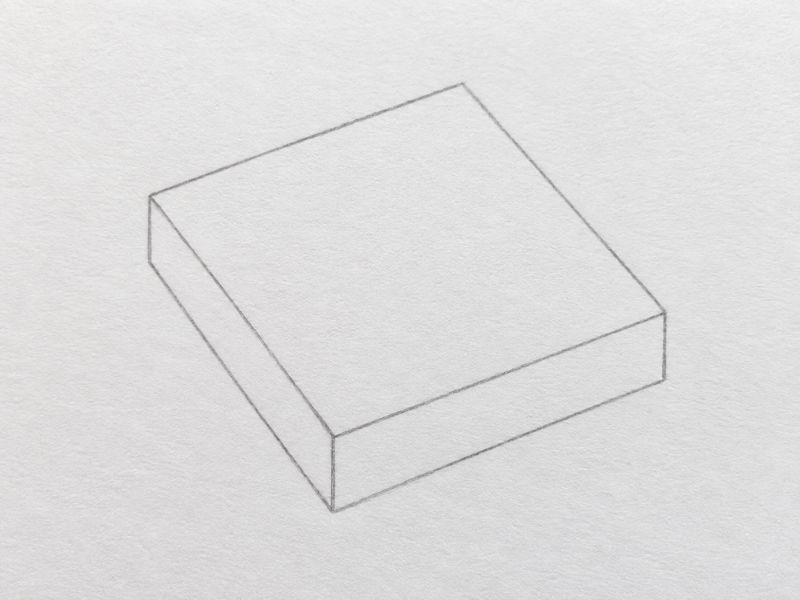
Draw a flat box seen from slightly above and slightly to one side, like a thick brick lying on a table.
The top face is a parallelogram, not a rectangle, because you are looking at it from an angle. The front edge and the side edge both run away from you at slightly different angles. Keep the whole thing wider than it is deep.
If the box looks convincing, the book will. If it does not, nothing after this step will rescue it.
Step 2: Split it into three slabs
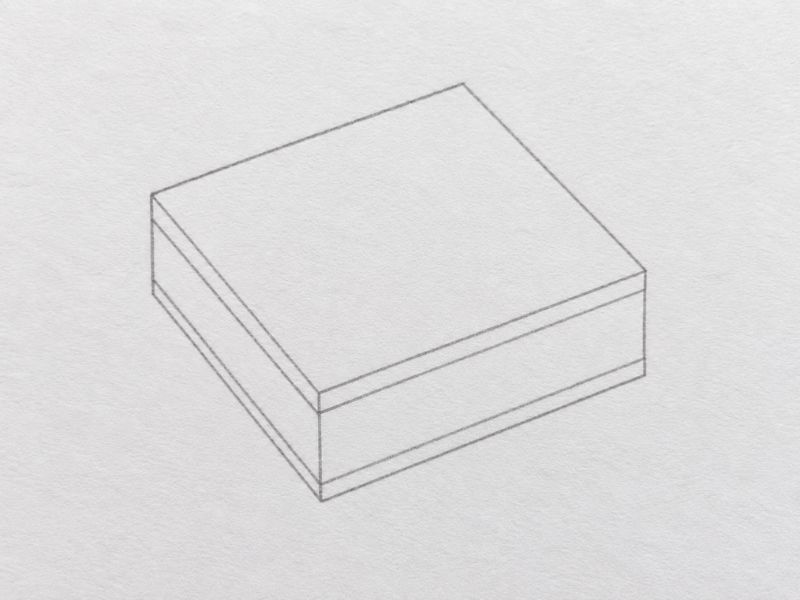
Divide the thickness of the box into three horizontal layers: a thin slab at the top for the front cover, a thick middle for the page block, and another thin slab at the bottom for the back cover.
The page block should be considerably thicker than either cover. A spell book is meant to be heavy, and thickness is how you say that without drawing anything else.
Step 3: Make the covers overhang
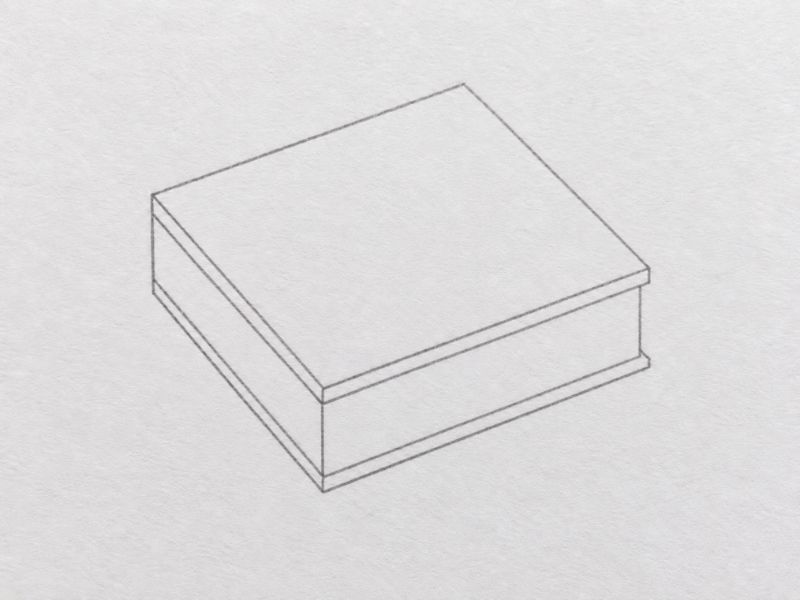
This is the step that matters most.
Extend both cover slabs so they stick out past the page block by a small margin on the front edge and both side edges. Not the spine edge, where the covers meet the binding and stay flush.
That tiny lip of overhanging cover is what your eye reads as a hardback book. Without it the object reads as a stack of paper or a closed laptop.
Keep the overhang small. Two or three millimetres at the scale most people draw is plenty.
Step 4: Give the page block some life
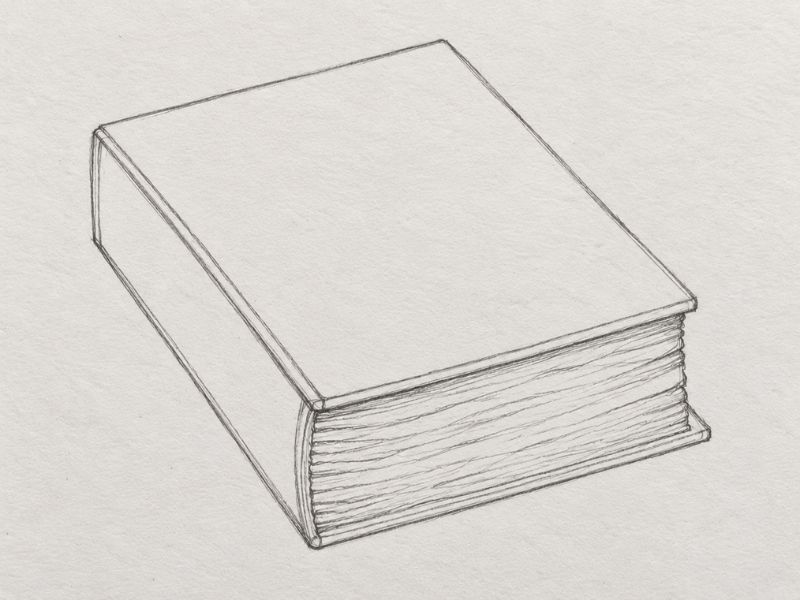
Draw the pages as a series of horizontal lines along the front and side edges of the middle slab.
Do not rule them evenly. Real page blocks are uneven, and they bulge slightly outward in the middle rather than running dead straight from cover to cover. Vary the spacing, let some lines merge, leave gaps.
Curve the whole block outward a little at the front edge. A book that has been opened a thousand times does not close flat, and that gentle swell is what makes it look used rather than new.
Step 5: Bands, clasp and damage
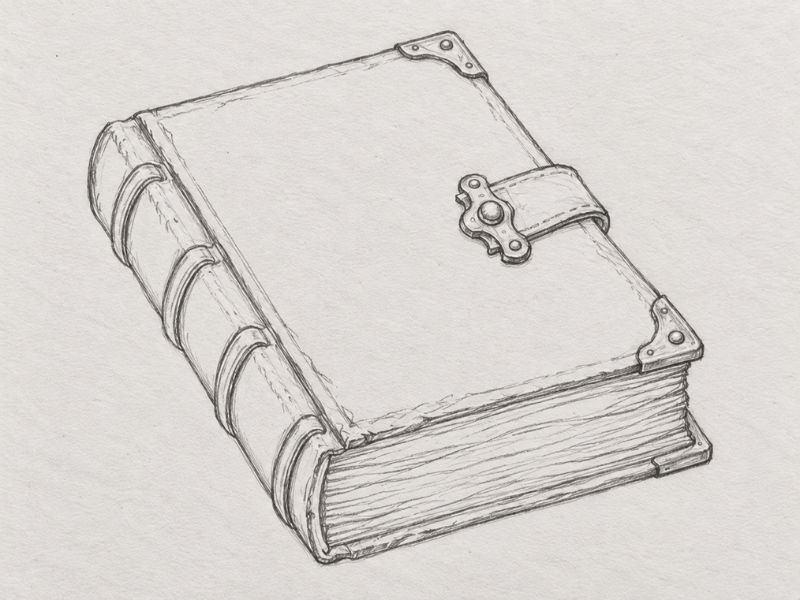
Now the parts people think of as the whole drawing, which is why they belong in step five rather than step one.
Two or three raised bands across the spine, drawn as narrow ridges. A leather strap crossing the front edge with a metal clasp holding it shut. Corner caps on the two outer corners of the front cover.
Then break it. Round the corners off, dent one edge, let the leather crease near the spine. A pristine spell book is a prop. A battered one has a history.
Step 6: The symbol, the shadow, the glow
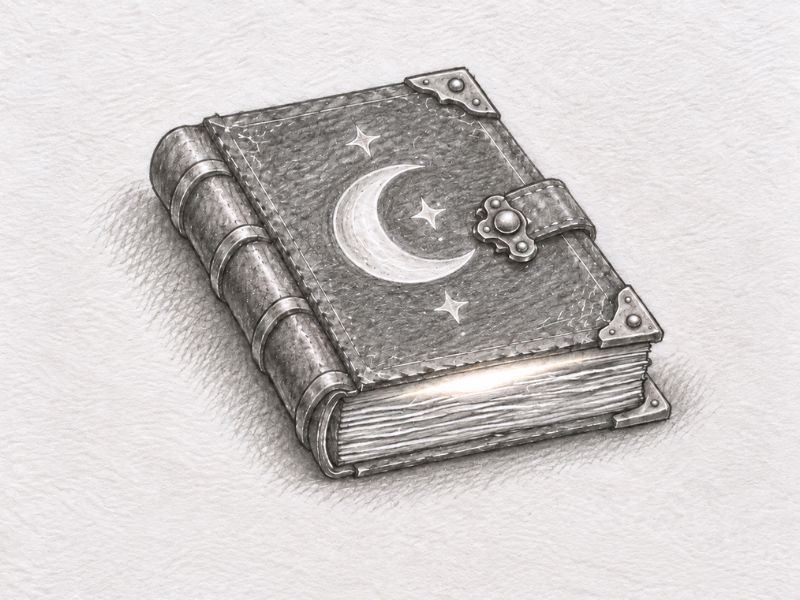
Draw one symbol on the cover, centred and simple. One large shape beats five small ones, and it should sit within the cover area rather than running to the edges.
Shade the book as a solid object. Darkest along the underside and the shadow side, lighter on the top face, and a cast shadow on the surface underneath it. Without that cast shadow the book floats.
Then, if you want it to read as magic rather than just old, add a thin glow escaping from between the pages at the front edge. A white gel pen line along the top of the page block and a soft light spilling onto the cover above it does the whole job.
Common Spell Book Drawing Mistakes
- Drawing the top cover as a flat rectangle
- Making the cover and pages the same size
- Using perfectly even lines for old pages
- Adding too many small symbols to the cover
- Forgetting the cast shadow underneath the book
The Box Test
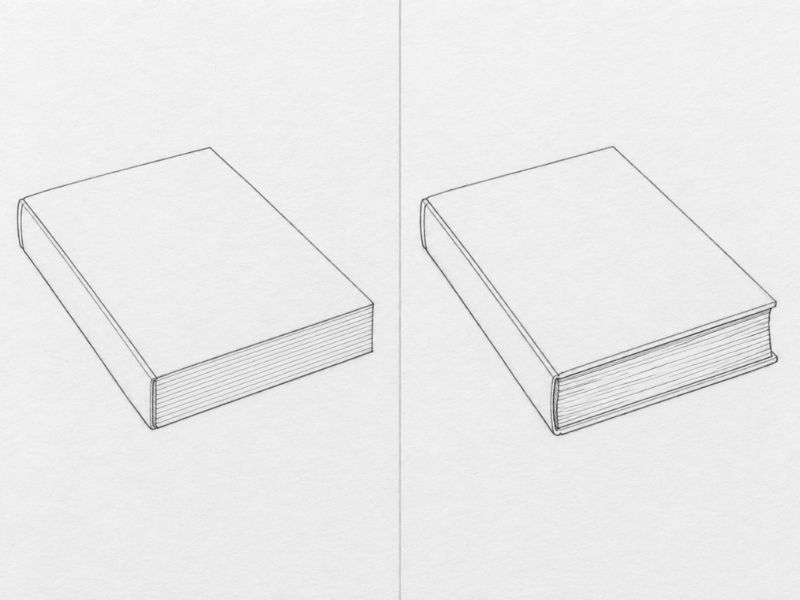
Cover the clasp, the symbol and the spine bands with your hand and look at what is left.
If the remaining shape still reads as a solid three dimensional object sitting on a surface, the drawing works. If it flattens into a shape on paper, the problem is in steps one to three and no amount of detail will fix it.
The usual culprit is the overhang. Check that the covers stick out past the pages. It is a two second fix and it changes everything.
Go Draw Something Heavy
Draw it three times. The first teaches you the box, the second teaches you the overhang, and the third is the one you keep. That is all how to draw a spell book really involves.
The same box thinking works on chests, coffins and crates, so it is worth the practice. If you want something to sit beside it on the same page, the potion bottle tutorial on the site pairs well.
And the rest of my Halloween drawing ideas post has plenty more objects that want this treatment.