
It’s that time of year again when the leaves start to change color, the days get shorter, and spooky decorations start appearing in stores. If you’re looking for a fun project to do this Halloween, why not learn how to draw skulls?
Skulls are a great way to practice your drawing skills and they can be used for all sorts of Halloween-themed art projects. There’s something about skulls that just makes them so darn spooky.
Maybe it’s their realistic form, or the macabre nature of death they represent. No matter what your reason for wanting to learn how to draw skulls, I have got you covered.
In this tutorial, I will show you how to draw a skull step-by-step. This is a great activity for all ages and can be done with any drawing materials you may have. So grab your pencil and paper and let’s get started!
Supplies You will Need
- Paper – 300 GSM watercolor paper
- Pencil – 6B and 9B
- Eraser – High quality eraser
- Outline Pen – Fine line pen
- Color – Watercolor
How to Draw Love Nose Skull with Teeth
Step-01: Draw an edged half circle for the upper side of the skull head.

Step-02: Make a hexagon below the half head for making the jaw .

Step-03: Draw two curved lines on the both side of the skull for making the jaw look like a real human jaw line.

Step-04: Now, draw two semi round circle inside the jaw line for making big eye hole.

Step-05: It’s time to draw the nose of the skull. So, draw a small upside down love on the middle lower side of eyes for the nose.

Step-06: Connect the lower side of the jaw line with two horizontal lines for the teeth portion.
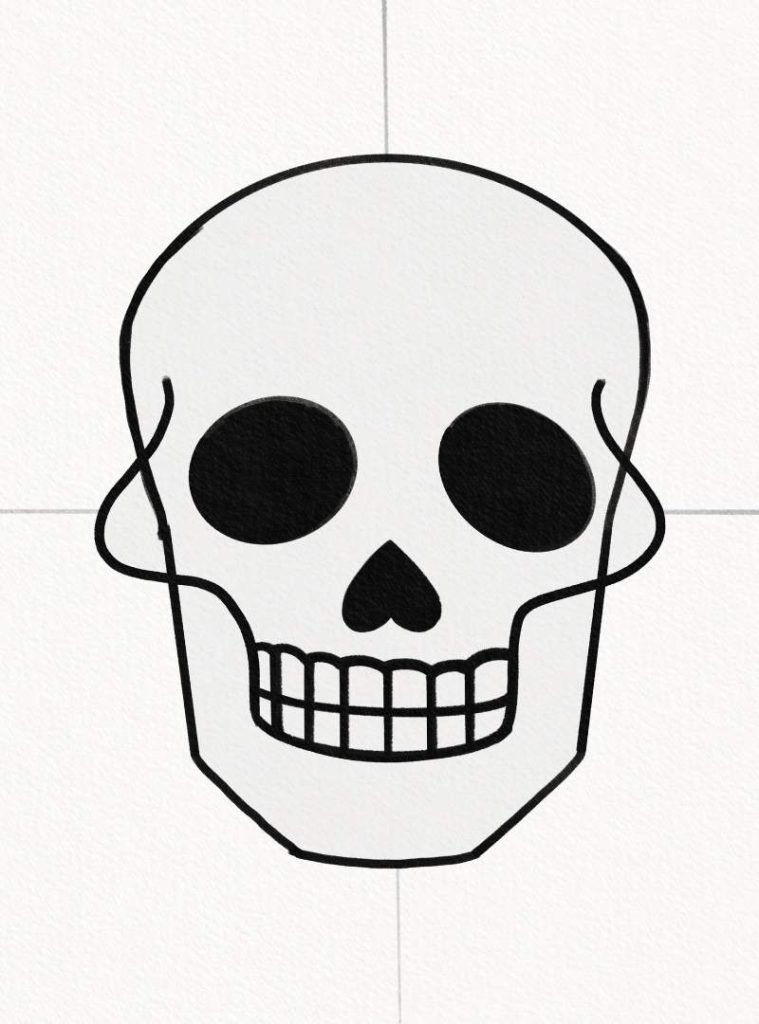
Step-07: Now, draw the teeth with square boxes just like the human teeth.
Color It: Finally, color the skull to make it look spooky and creepy for Halloween! I have used black color for the eyes and nose. But You can use different shades of black, grey, or white to add a dramatic effect.
Drawing Love Nose without Teeth
Step-01: First of all, draw a half circle to make the skull look round.
Step-02: Then, draw three curved lines below the half circle to make the bottom jaw.
Step-03: Make two circles inside the skull head to make the eyes and a upside down love shape for making cute nose.
Color It: Finally, fill the skull with color to make it look realistic. I have used black color for eyes and skull outlining. You will also notice that I have used red color for making the nose more adorable.
However, you are always welcome to experiment with different color combinations to make your drawing more unique.
Drawing Fiery Skull

Step-01: Start by drawing a half circle for the upper side of the skull. Then draw three curved lines for making the lower jaw as shown in figure.
Step-02: Now, it’s time to give the skull it’s original look. So, draw two small circles on the upper side for eyes, a small triangle for nose and a horizontal and some vertical lines for a sewed mouth.
Step-03: After giving the skull it’s scary look, make a fiery icon outside the skull head. It will look like the skull is emerging from the flames. You can draw some red colored lines on the skull to enhance the fiery effect.
Color It: Finally, use some colors to bring your skull drawing to life. I have used yellow color for the flames and black for the skull itself. You can go for other colors as well, depending on your preference.