
A student sent me a drawing two Octobers ago and asked why it wasn’t scary. She’d done everything right on paper. Cobwebs in the corners, a bat crossing the moon, a ghost floating in an upstairs window, one of those wrought iron fences with the spear tips.
It looked like a nice house with Halloween decorations on it.
I asked her to hold the page at arm’s length and squint until the details blurred out. What was left was a tidy rectangle with a neat triangle on top. Perfectly pleasant. The kind of house a child draws when they’re happy.
That’s the thing nobody tells you about how to draw a haunted house. The fear doesn’t live in the cobwebs. It lives in the outline, and your eye reads the outline first, long before it gets around to noticing a bat.
So we’re going to build the shape wrong on purpose. Towers at mismatched heights, a roofline that dips in the middle, a chimney that leans off its axis. Six steps, and every one of them only adds to what’s already on the page. Nothing gets moved or redrawn.
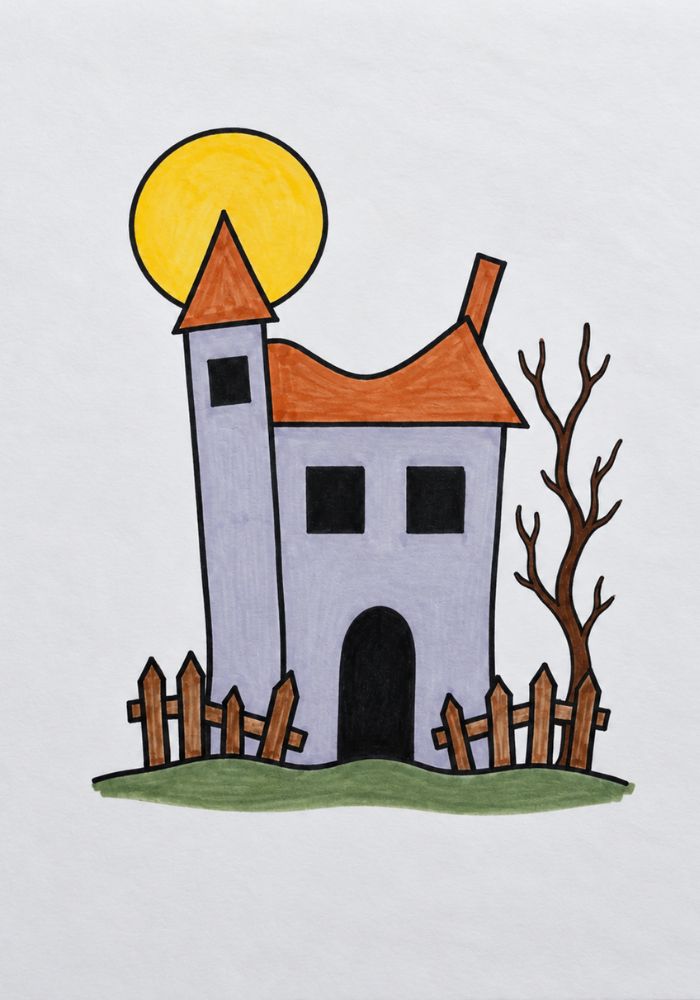
What You’ll Need
- A 2H pencil for the boxes (light enough to disappear under ink)
- A 0.5mm and a 0.8mm fineliner
- A black brush pen or any marker that fills solid areas fast
- Plain 80gsm printer paper, portrait orientation
The brush pen is the one that matters. Step six is mostly filling black, and doing that with a 0.5mm nib takes twenty minutes of scribbling and leaves visible stroke lines. Any cheap brush pen with a flexible tip will do it in two.
How to Draw a Haunted House Step by Step
Portrait page. Roughly twenty minutes.
Step 1: Two boxes, different heights
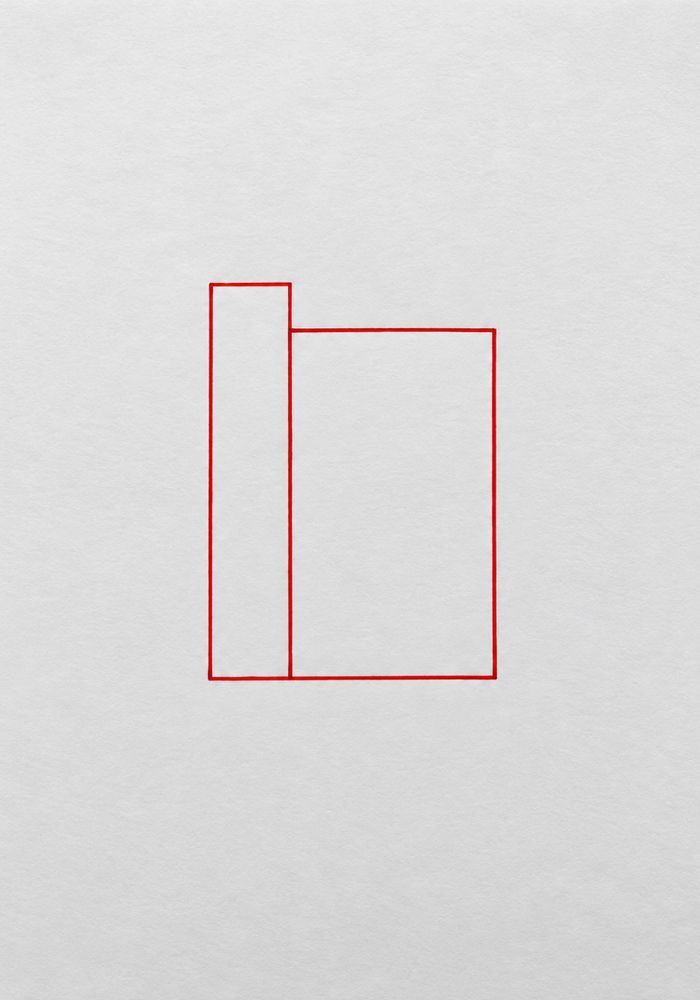
Draw a tall rectangle in the middle of your page, about one and a half times taller than it is wide. That’s the main house.
Now add a narrower rectangle against its left side, a third as wide, rising about a third higher. Same baseline, both sitting flat on the ground.
Different heights is the entire point. Two matching towers read as a church.
Step 2: Roofs and a chimney
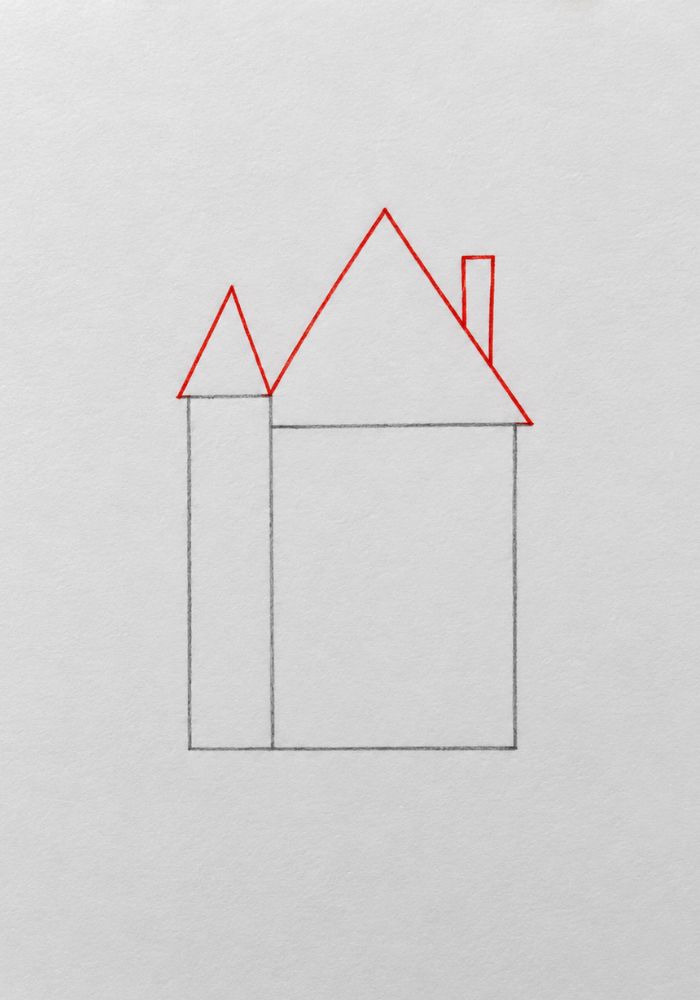
Put a steep triangle on the main box, peak centred. Put a second, narrower triangle on the tower.
Steep matters. A shallow roof reads suburban and safe. Push the peak high and the house immediately gets older.
Add a thin chimney on the right slope of the main roof, tilted a few degrees off vertical.
Step 3: Windows and a door
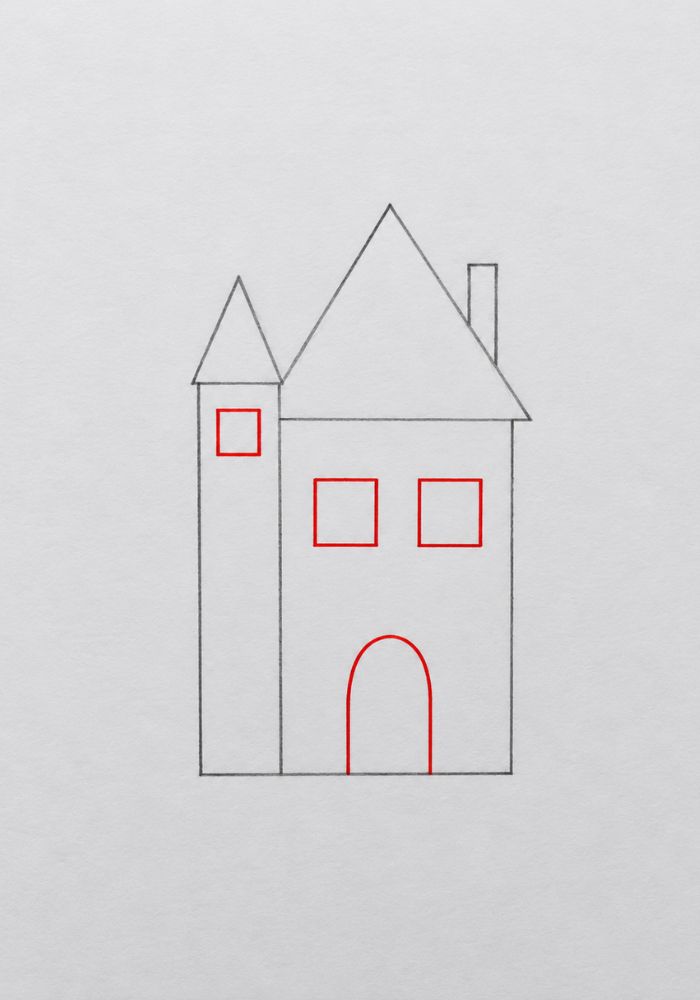
Two square windows side by side in the upper half of the main box. One arched door at the bottom centre. One small square window high in the tower.
Keep them simple rectangles for now. Resist the urge to add panes or shutters, because you’re about to break them and it’s easier to break a simple shape.
Step 4: Now bend everything
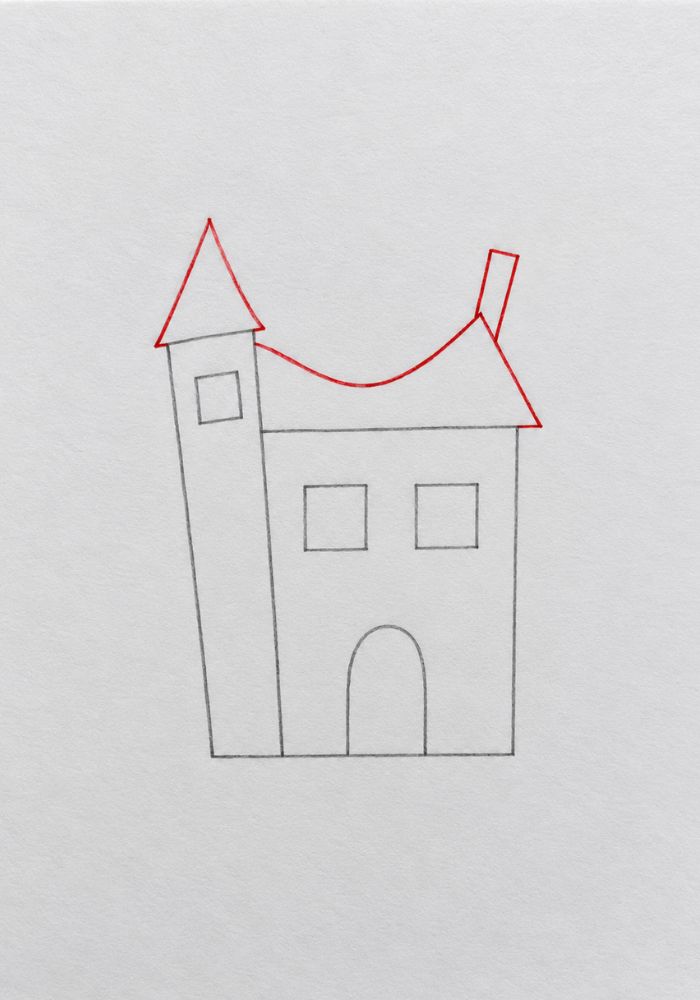
Here’s where it stops being a house.
Dip the main roofline so it sags in the middle instead of running dead straight. Lean the tower a degree or two off vertical, away from the main house. Push the chimney further off its axis. Let the door frame tilt slightly.
Small amounts. Two or three degrees each. Go further and it turns into a cartoon, which is a different drawing with different rules.
Step 5: Put it somewhere
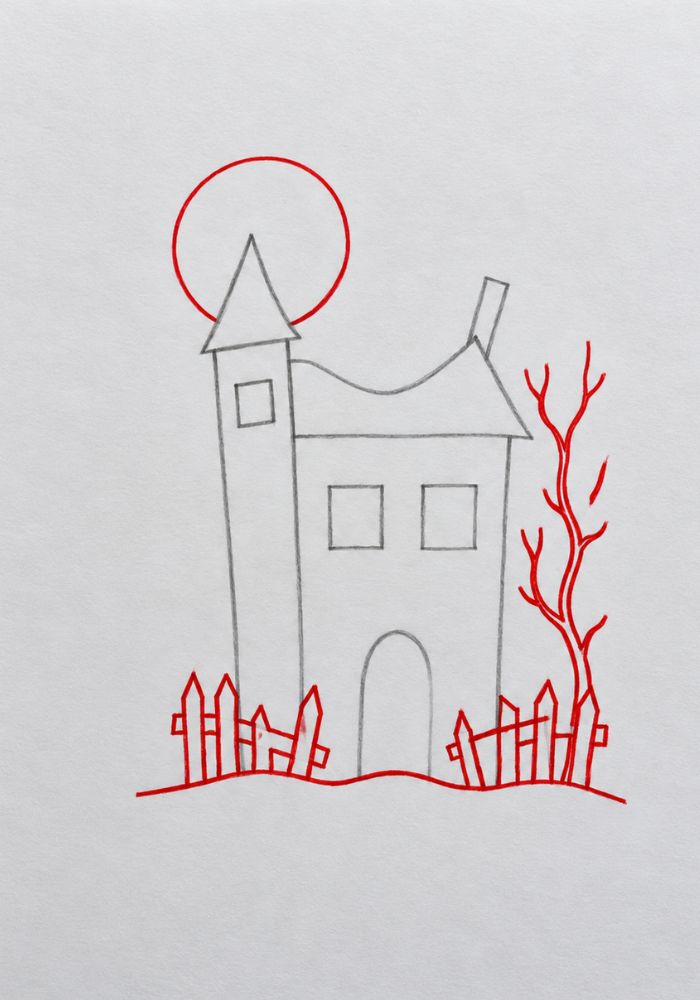
A wobbly horizon line behind the house, a bare tree on the right with three or four branches, a broken picket fence across the front, and a full moon behind the tower.
Overlap the moon with the tower rather than floating it in clear sky. Overlap is what makes a drawing feel like a place instead of a collection of objects.
Step 6: Ink it, then kill the windows
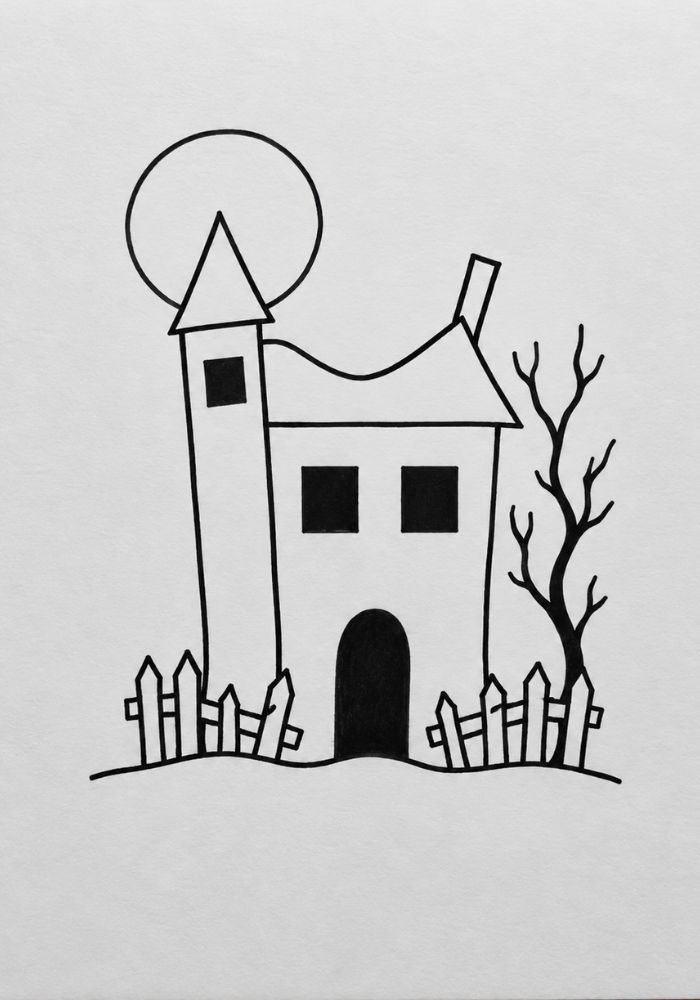
Ink your outlines with the 0.8mm, the tree and fence with the 0.5mm. Erase your pencil once it’s dry.
Then fill every window and the doorway solid black. All of them.
This is the step people skip, and it’s the one that does the work. A lit window says somebody’s home. A black window says nobody has been home for a long time, and your brain fills the dark with whatever it wants to.
Leave one window lit if you want a story, but only one.
The Squint Test
Hold the finished page at arm’s length and squint until the details go soft.
You should be looking at a lopsided black mass with a dipping roof and a tower that doesn’t sit straight. If that shape is unsettling on its own, the drawing works, and every cobweb you add from here makes it better.
If the squint gives you a tidy rectangle with a triangle on top, adding detail won’t save it. Go back to step four and push the sag and the lean further. It’s almost always step four, and it’s almost always because people were too polite with it.
Three Ways to Make It Worse
Fog at the base. A few horizontal strokes across the bottom of the house, leaving the top half clean, so the building looks like it’s standing in something.
Nothing behind the windows. No curtains, no ghost, no candle. Solid black is scarier than anything you could draw inside it.
Birds, not bats. Three or four small crow silhouettes scattered at different sizes reads as genuine dread. Bats read as a party.
If you want the classic version anyway, a bat silhouette against the moon is two minutes of work, and there are plenty more easy Halloween drawing ideas to fill the rest of the page.
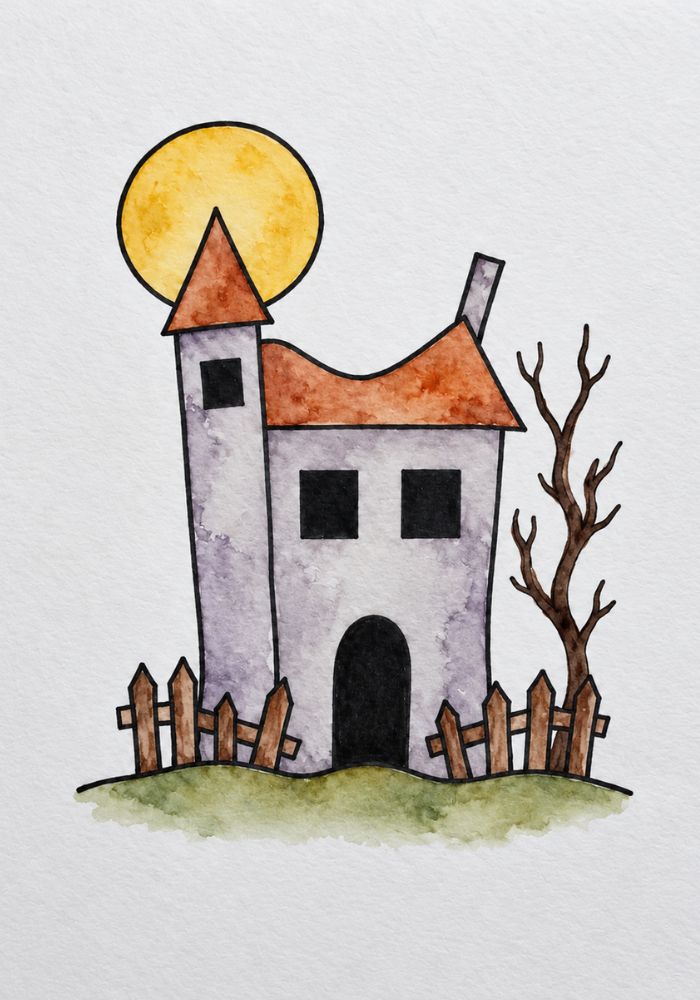
How The Haunted House Will Look When You Use Different Coloring Tools
Watercolor Painting
Coloring with Markers
Coloring with Crayons
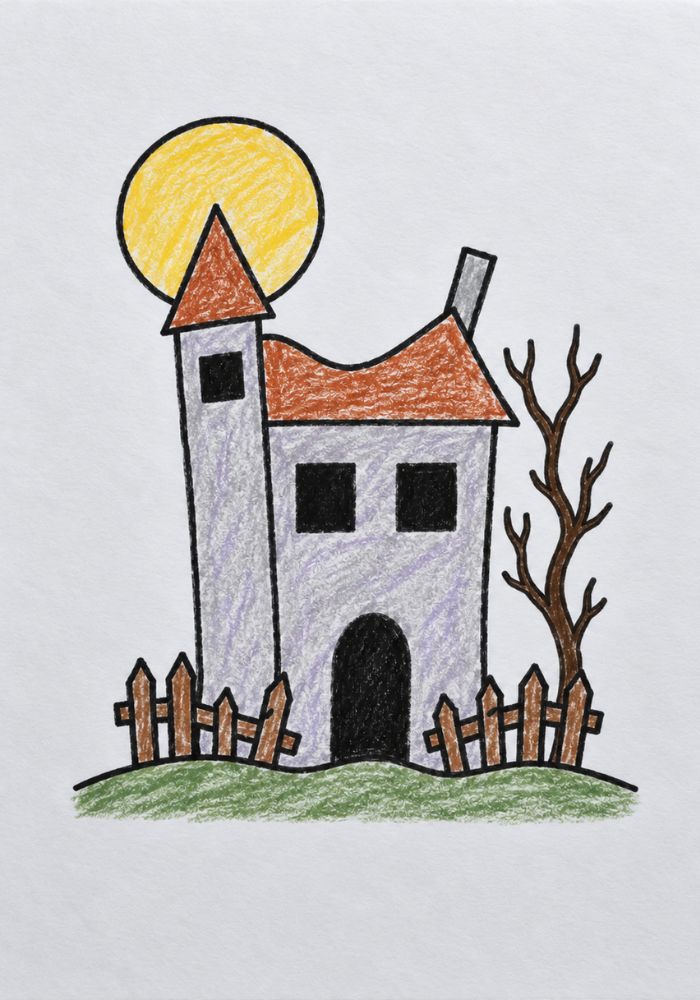
Using Coloring Pencils
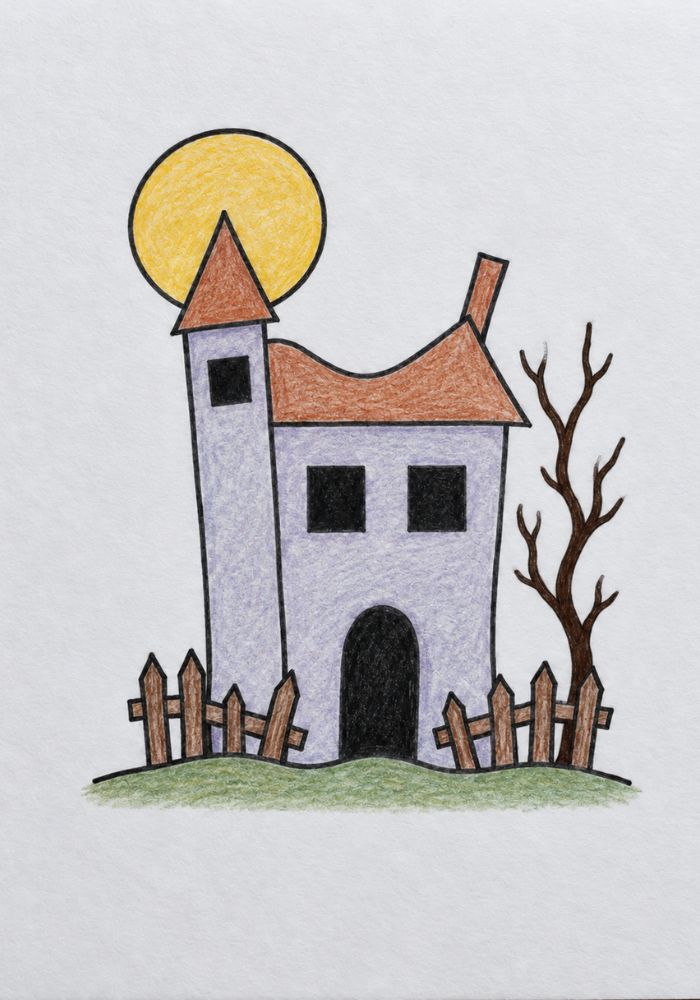
Go Break a Straight Line
My student redrew hers that evening. Same house, same bat, same fence. She just dropped the roofline and pulled the tower two degrees left.
She said it made her uncomfortable to look at. Which was the point.
That’s the useful part of learning to draw a haunted house properly. You’re not learning to draw a building.
You’re learning that your eye judges a silhouette in about a tenth of a second, and everything you add afterwards is only decorating a verdict it already reached.
Squint at yours. Be honest about what you see. Then go make it worse.