
You have used markers on a plastic surface and I do believe when you say it is taking hours to get that thing dry. Touch it before it does and just like that, you have a smudgy mess all over you.
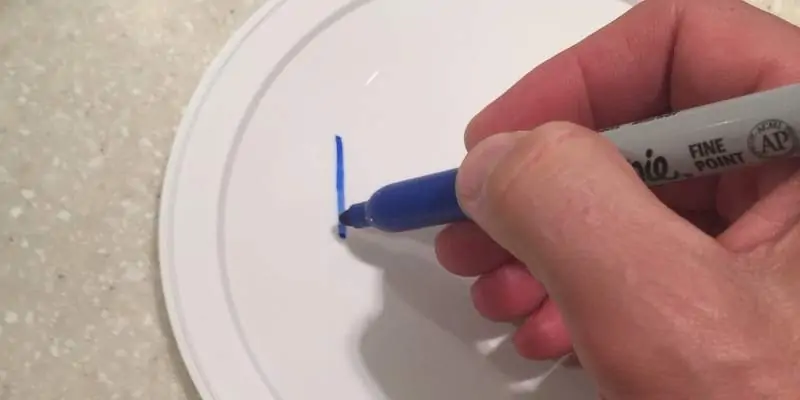
Now you might ask yourself how to keep sharpie ink on plastic? Do you just blow on it use or use some of that ‘5-minute craft’ advice? Fret not, I have just the solution to your rescue.
There are certain tick boxes to tick on before you even start your project or start working with permanent markers on a plastic surface. Not only plastic but also any surface that has not been sanded over can cause such an issue. For instance, tiled surfaces
Get Rid of Any Fat on the Surface
First and foremost, you have to make sure the surface is completely clean. Any oil residue or fatty substance can make the process unnecessarily tough. No one needs unnecessary trouble in their life. Clean the surface with mild dish soap and warm water. In some cases, you can use a slightly acidic cleaner such as lemon juice or vinegar. Soak a dry cloth into the solution and wipe the smooth surface.
As the acid cuts off the fat, it will work great. But be very careful not to be very vigorous with it. And do not let it find its way to your eyes.
Chose the Right Type of Markers
Markers have types too. You’ll find water-based and oil-based markers. If you want your art piece to last as long as it possibly can, choose the latter one. Oil-based markers are known for being permanent on many surfaces like glass, plastic, metal, pottery, wood, rubber, and so on.
These markers will also leave a shiny finish. Want them, haters, to be bamboozled with all the shininess of your life? Use oil-based markers. Also, they tend to stick better and stay longer.
Preparation to Keep The Ink Permanent
Prep the surface beforehand. Yep! It matters. In your desired project if it is not a boundary, do prep the surface by sanding. A sanded surface will give your marker a better chance to grip on. Use 120-grit sandpaper to give it the desired roughness. Rough surface gives it grip.
If you are really bothered by the sanding, you can make it smooth again by using some epoxy later on. Or there are some polishes with making it shiny again! Better you can use a magic eraser if possible. Look it up if that is your concern here.
Let it Dry
Now that you have sanded the surface, it is ready to be written on. What you have done by sanding the surface is you have created microscopic holes for the ink to sink in. Remember using an oil-based marker? Yes, using that has helped your cause further as we all know water and oil are not the best of friends.
So, the moisture from the environment will keep out rather than being friends with the oil buddies. One love-hate relationship that benefits us all!
After writing or doodling on your desired design on the surface, leave it for more some hours. Let this masterpiece of an art dry while you enjoy your leisure time.
Extra Sparkles!
Who does not love some extra shine to anything! Personally, I do a lot. All that sanding might have made the plastic look a little ugly. Sorry plastic I don’t mean that! Jokes aside! If you don’t like the look of it use resin on it.
There are plenty of tutorials out there on YouTube on how to use resin. It will make your project even more permanent than only securing the marker strokes. And the added benefit would be that glossy shine which we all love.
Seal the Deal
We got you even if you’re not all about that shine. There are plenty of other ways to seal the marker design, your precious plastic art. Use mod podge to seal the Sharpie marker in place. There are liquid and spray-on. Spray ones are easier to use.
Just spray the mod podge and wait for it to dry and then you can even use Windex to test my words. Go ahead and do that, you’ll see that it won’t come off. Do you see it? I don’t lie.
There are some waterproof sprays in the market like NeverWet. Theoretically speaking, if you had used an oil-based marker as I have suggested before, then this idea might just work wonders. As you know oil and water don’t mix. So, by spraying that you will be making the plastic surface waterproof. Thus, the marker stain should very well stay on the plastic surface. Give this one a go!
There are all sorts of sharpie/markers available in the market. So, maybe directly search for one that has dedicated its life towards plastic surfaces. I mean find one that specializes in this task. If there isn’t any already, maybe try inventing one? Necessity is the mother of invention after all! I’m only kidding.
Another Easy Way to Keep Marker Permanent on the Plastic
But suppose the marker ink could be made such as to persist on the surface for a more prolonged period, wouldn’t it be much better? This is where coating comes in.
A proper coating with clear nail polish over the surface where you wrote will help ensure the marker writings stay there for an increased period and also keep the surface dust-proof and smear-proof. Once coated and allowed to dry, the surface will give off a shining look thereby making your writing also a fine specimen of art to be looked at which is a plus-bonus.
Frequently Asked Questions
Q: What type of marker stays on plastic?
Sharpie oil based paint marker stays long on the plastic surface. These markers are designed to be used on both indoor and outdoor surfaces, such as plastic, metal, and wood.
Oil based Sharpie markers will stay on the surface longer than traditional permanent markers. It makes them perfect for projects that need an extra layer of protection. They usually come in vivid colors and can provide a glossy finish with one coat of sealer.
Q: How do you waterproof Sharpie on plastic?
For waterproofing Sharpie on plastic items, mod podge is your best bet. Mod podge is a type of decoupage glue with a glossy finish that seals in ink and prevents smudging or bleeding through the plastic surface.
It also provides additional protection against scratches and fading to make sure that your artwork can last for years to come!
To use mod podge, simply brush it on top of your design and let it dry. Once it has dried, you can apply a layer of sealant to make sure that the ink is completely waterproof and smudge-proof.
Q: How do you seal acrylic marker on plastic?
For sealing acrylic marker on plastic, using a sealant or varnish is the best option. It will help to secure the marker on the plastic. It will also protect the ink from smudging or running when touched.
However, I recommend you to choose a clear, non-yellowing acrylic sealant. It will not damage your artwork. Spray-on sealant is one of my favourites!
Spray the sealant onto your project in a well-ventilated area, making sure to avoid over-spraying or clogging nozzles. Cover the entirety of your artwork with an even layer of sealant and allow it to dry completely before touching it again.
Q: Does permanent marker last forever?
No, it doesn’t. With regular washing and usage, it will eventually fade away. But how to keep your artwork intact?
The answer is simple – prepare the surface properly and apply a clear sealer. So, whenever you use permanent marker, clean the surface properly using rubbing alcohol. Then, let the area dry completely before you start creating your masterpiece.
Once you’ve finished drawing, it’s time to apply a clear sealer. It will keep the ink from smudging or fading away over time.
Q: How do you varnish permanent marker?
For varnishing permanent marker art, you can use Krylon’s Kamar varnish. The brand claims that it won’t react with the alcohol ink. It protects the art from fading or smudging and makes it last longer.
For using Krylon’s Kamar varnish, simply spray a light coat over your finished work. Now, let the top coat dry before adding another layer if desired. You can also use this type of sealer on other materials like glass or metal.
It is an easy and affordable way to keep your permanent marker art looking great for years. And I also love this varnish for using over permanent marker.
Final words
Last but not least I hope your questions has been answered throughout the whole article. Yet there are so many ways and other options to draw on plastic surfaces. If you fancy that you might want to check them out.
Plastic surfaces are really a creative way to express any emotions in the words of art. It looks very pretty and unique. Obviously, you would not love it when your art gets smudged over and ruin hours of hard work. Try out these ways to make sure they stay right where you put them. Hope, you will love it!
Related Content: How to Remove Permanent Marker from Plastic
Update: October 2023 by @loardeva