
People use highlighters to help them remember important passages in books or other writings. It’s also one of the popular school supplies. But over time, the tips may get clogged and dirty due to any ink absorption or other causes that make it less effective.
And, do you have a highlighter that is no longer working the way it should?
If yes, then no worries at all!
Luckily, most of the highlighter markers use water-based ink, and you can clean the highlighter pen’s tip with soapy water. So, you will also be able to highlight essential points without worrying about running out of ink too.
The following article will show you detailed steps on how to clean highlighter tips most efficiently. And you’ll be back on your game in no time!
Important
You may use top-notch highlighter brands, but it doesn’t mean they cannot malfunction. For example, when you highlight over any lower-quality ink text, it may get into the tip. Even if you go over pencil writings, especially charcoal pencil, the ink will get absorbed into the highlighter tip.
Well, that doesn’t mean you should go for a replacement right away. You can clean the tip to get the most out of your highlighter for a little bit longer.
So, it’s okay to take the help of these tip cleaning methods that are available just near your hands. Here I’ll mainly focus on the water method as highlighter ink is water-soluble.
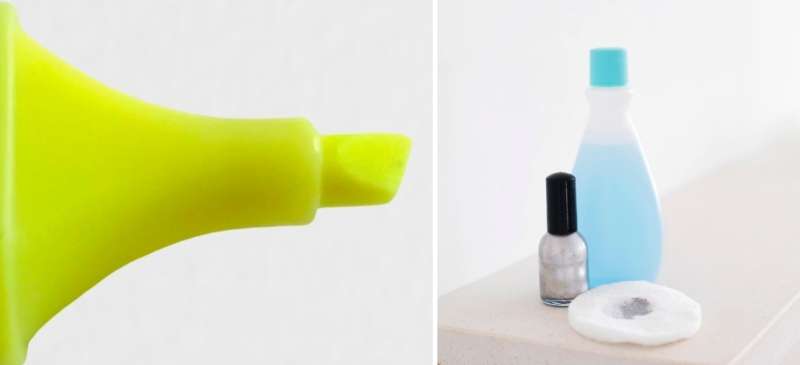
Things You’ll Need
- Warm Water
- Craft Knife
- Liquid Dish Soap
- Nail Polish Remover
- Small Bowl
- Small Pliers
- Paper Towel
Ways to Remove Mark from Highlighter Tips
As much as you use highlighter pens, the more chance of getting tips dirty increases. It can make them less effective for highlighting. But there are ways by which you can make it as clean as new. You’ll get one of the easiest methods below, named “Water Method,” to clean highlighter tips.
Before going to the main process, one question may come to your mind that, “Is the process same for every size of highlighter pen?”
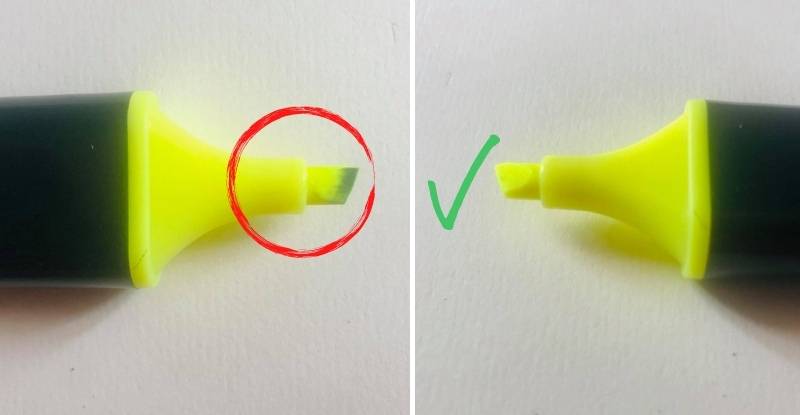
Well, highlighter tips come in different shapes and sizes, namely – bullet tip, fine tip, dual-tip, prolonged tip, and chisel tip. But among them, people use mostly chisel-tipped highlighter pen worldwide. And the process of cleaning them is also the same for all.
So, this step-by-step procedure will help you remove dirt from highlighter tips without any mess or hassle. But you have to proceed with caution.
Using Soapy Water – The Most Effective Method

If you want to bring back your highlighter’s bright colors, you just need nothing but some soapy water, and your work will be done. So, let’s the process begin.
First Step: Hold your pen in one hand and take a craft knife in the other hand. Then, separate the tip part from the body to open the highlighter (though the opening method may vary depending on brands).
Now, keep the back part means ink sponge part aside safely so that no ink leakage happens. You can also lean the part with a wall or something hard so that the ink sponge doesn’t come out.
Then use a small pliers to remove the tip from the upper body. You can use rubber-coated pliers for a comfortable grip. Using a plier will help you to separate the tip without any hassle or damage.
Second Step: In this step, put the tip on a paper towel to remove all the excess ink from the tip. Paper towel works like absorbent materials here. You can use a clean cloth, kitchen tissue, or similar items you found near your hands if you want.
Wrap the tip up with the paper towel and slowly press to get rid of highlighter ink. At a stage, you’ll see that there is no ink left on the tip. Then move to the next step.
Third Step: Now, take a bowl of water, not just normal or cold water. It should be lukewarm water. Then put some liquid dish soap into it and mix well. You can also take bar soap if you don’t find any liquid soap around.
So, soak the tip into the soapy water and let it stay there for some minutes. It’ll help to absorb the liquid properly.
Fourth step: Then take out the tip from water and scrub it with fingers. If you want, you can use baby brushes also. Continue the process until you see the tip is becoming white color. Remember, the tip is never going to look wholly white or slightly maybe.
But after scrubbing for some time, the dirt will be visibly clear, and you can tell that it’s working. While going through this process, you may need to soak the tip into the soapy water repeatedly. That’s not a problem at all!
After dirt cleaning, you can wash the tip with a bit of water. It’ll make the tip fully clear and clean again.
Final Step: Now, take a paper towel and wrap the tip again to absorb the excess water in it. After pressing for some time, you’ll get it thoroughly dried.
Lastly, using the pliers, set the tip into the highlighter and join all the parts. Then holding the pen with a paper towel, shake it vigorously for some time as you don’t want to spread the ink all around your working space.
It’ll help to bring back its true color, and your pen will be ready to work like before.
Use Nail Polish Remover – Alternative Way
It’s an alternative to the water method. But hearing the word nail polish remover, most people think that it’s the regular one containing acetone. It may fix a dried-out highlighter but will not be helpful for tip cleaning.
So, in this case, you have to use a non-acetone nail polish remover which is also helpful for removing highlighter marks from paper. Since highlighters contain water-based ink, you cannot put alcohol on its tip.
However, you have to do this process in the same way as doing the water method. To do so, firstly, take a small bowl that has enough space to put your hands on. Then pour a gentle amount of nail polish remover into the bowl.
Now, take a small plier to separate the tip from the body carefully. Next, keep that tip on a paper towel and press on it by covering it with a paper towel. It’ll help to absorb all the extra ink on the tip just like before.
Next, you’ve to put the tip into the bowl that contains the remover and let it inside for some time. Then scrub it as before to remove all the dirt and stains.
Lastly, use the paper towel once again to absorb the liquid remover. And set the pen as before, do some gentle shakes and use it as before.
Now that you’ve known the magic of non-acetone remover, do you know how non-acetone nail polish can be helpful in other ways? Interestingly, you can use non-acetone clear nail polish coating to keep dry erase markers on laminated paper for a longer period.
Keep In Mind Before Cleaning Highlighter Tips
If you want to keep the highlighter tip clean, you should look after some factors.
It would be best if you didn’t use your highlighter over lower-quality documents with cheap type ink. It’ll not only damage the paper, but also ink will come out when you glide the highlighter over them.
Are you going to highlight the text that you write just now with a gel pen? Stop right there!
Well, you may know that gel pens take time to dry, depending on the quality of paper. And when you highlight new writing, the gel ink will come out with the tip, and it will get dirty.
So, after writing with a gel pen, let the ink set for some time and then use a highlighter on it.
Don’t go over pencil ink! It really makes the tip pretty dirty and greasy, specially the black ones like a charcoal pencil. Instead, you can underline the important text with highlighter pen or make a box around the text that is written with pencil ink.
Word of Caution
First of all, you shouldn’t take hot water as it can damage the tip. And don’t use any moisturizing soap bar as it won’t help dissolve the dirt or grease.
Again, you can’t use acetone-based nail polish remover for tip cleaning. Since acetone is an alcohol, it’ll damage the tip for good, and you may not use your pen again!
In addition, it acts like rubbing alcohol. So, it can be helpful to get rid of highlighter stains but not ideal for tip cleaning.
Another important thing is, in the final step, when you’ll set up the tip, make sure to set it correctly. It’ll be easier for you when you place a 1.5 mm tip, but it’ll not be that easier to set a 2 mm tip.
While opening up the marker tip with pliers, proceed carefully. Please don’t make any rush as it can damage the tip. But if you don’t have pliers near your hands or if you find it difficult, you can also open the highlighter without it.
How to Open a Highlighter Tip Without Pliers?

It’s a piece of cake! Though the opening process may vary. But from my experience, I can say that Stabilo Boss Highlighters are pretty easy to open. You don’t even need a plier or craft knife for this.
- First, wear hand gloves if you don’t want any ink on your hands. Then hold the marker and uncap it.
- Next, place one hand on the upper part near the tip and the other near the lower part.
- Then pull the two parts in the opposite direction. And voila! The upper part and lower part have become separated.
- Now, remove the tip out of the plastic body, and it’ll be on your hands. Pretty easy, isn’t it?
Well, if you afraid of removing with hands or if your highlighter is hard enough to open, then tweezer can be your best friend. For opening up the body, try to enter one side of the tweezer inside the jointing part.
Then press a little bit and push upward; the highlighter body will be separated. Then gently hold the tip with a tweezer and pull it out to clean it.
Wrapping Up!
Having your highlighter tip clean is essential for highlighting essential documents. And after coming so far, hopefully, you have got the idea of how you can do it quickly.
So, whether you get dirt on the tip accidentally or unconsciously, now you can make it clean like before just in minutes!